Ava with V Back Bodice & Tie
- Jun 6, 2023
- 2 min read
Updated: Jun 13, 2023
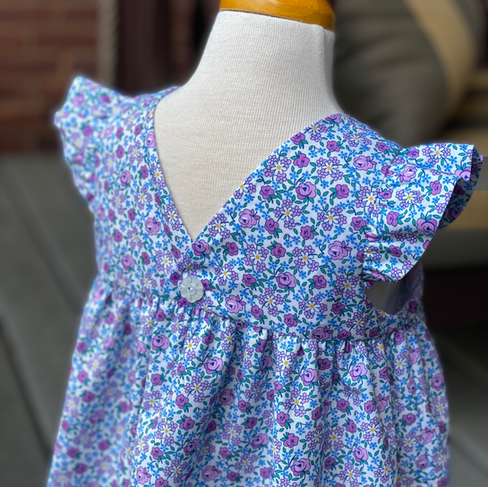
Make an Ava reminiscent of the back bodice of Children’s Corner Hillary (vintage cover art print available). This modification alters the back bodice pattern pieces. During construction you will use this new pattern for the back bodice and the back bodice lining. Back bodice lining pattern pieces #3 and #6 will not be used. In the video, Melissa explains the drafting changes needed to accomplish this look. Pictured fabrics are Flowerhouse Violet Roses and Betsy R by Liberty of London.
Supplies
Children's Corner Ava Tracing Paper Button - 1
V Back Bodice


2. Draw a line ¼ inch to the side of the fold line closest to the facing. Cut pattern piece on this line. The former fold line is now the seam line.
3. Measure up 1 ¼ inch from the lower edge and make a mark on the edge.
4. Draw a line from this mark to the inner corner of the shoulder/neck. Cut pattern along this line.
5. Place a dot at the new angle created at the seam line. This is the point where you will pivot machine stitching during construction.
6. Cut 2 back bodices and 2 back bodice linings from new pattern piece. Add other pattern markings from the original pattern piece.
7. Construct dress according to pattern directions. Omit step number 5. On step number 6, stitch center back when you stitch the entire neckline.
8. A single button will be placed at center back. Use a button at least ½ to 3/4 inch in size.
Optional Back Tie


1. Complete construction of the dress prior to adding ties. It is recommended that a button and buttonhole still be placed to secure the dress. The bow will cover this when tied.
2. Cut 2 strips of fabric 2 ½ x 18 inches.
3. Fold in half lengthwise right sides together and stitch one long side. Pivot, and stitch one short side.
4. Clip corners and turn right side out. Press well.
5. Fold the open end of the tie ¼ inch to the inside and press. Whipstitch end closed if desired.
6. Repeat steps 3-5 for the 2nd tie.
7. To mark tie placement on back bodice measure ¼ inch up from lower edge of the finished bodice and 1½ inch over from center back edge of dress. Draw a vertical line up measuring 1 inch. Repeat for other side of bodice.
8. Place open (or whipstitched) end of tie on the mark with the long end of the tie pointing towards center back. Topstitch in place securely. Repeat for other side. *For tips on how to tie a perfect bow, Melissa will teach you how in this video.
Adaptation by Melissa Sansom

Click the printer icon below for printable version.
