Eleanor with Box Pleat
- CC Store
- Apr 14, 2023
- 1 min read
Updated: Jun 3, 2023
A classic pleated dress is timeless. We’ve said it before, but we love the versatility of the Eleanor pattern, and this example with a pleated front is just one of the many examples.
Supplies
Eleanor Children’s Corner pattern
Template for pleat
Tracing paper
Buttons – 6
Cutting Instructions
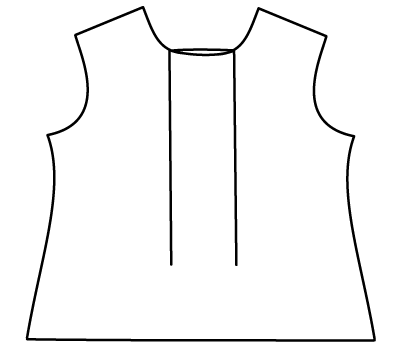
1. Use a pencil, and retrace the Eleanor dress front View B pattern piece, leaving 4” of tracing paper beyond the center front.
2. Measure 3” beyond the center front line and draw a parallel line down the length of the dress. Label this line “place on fold.” Extend the hem to the new line by drawing a straight line.

3. Align the template with the neckline and the place on fold line. Trace the updated cutting line for the pleated version.

4. Using your new pattern piece, cut the dress front and the remaining pieces per the cutting instructions in the pattern. The dress front lining does not have a pleat.
5. Transfer the center front line to the right side of the dress front fabric extending it 2 ½ - 3 ½” down.

6. With the dress front folded in half and wrong sides together, stitch down the center front line 2 ½" – 3 ½” down, backstitching at each end. Open the pleat, and press.
7. Baste the pleat in place around the neckline to hold the pleat in place.

8. Continue with the Eleanor view B instructions.
9. Embellish with buttons after completion of construction.
Adaptation by
Susan Whitman

Click the printer icon below for printable version.


