Sutton with Contrast Front Panel
- Apr 26, 2023
- 2 min read
Updated: Jun 6, 2023
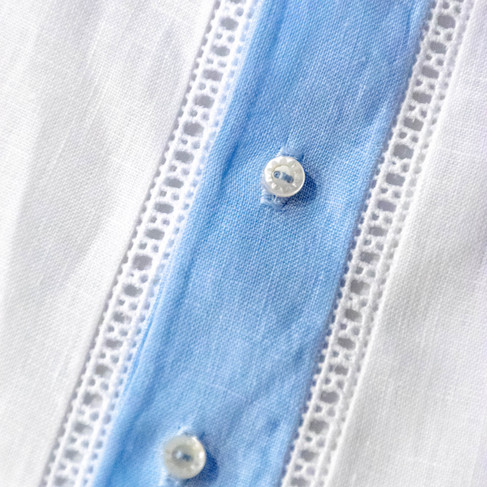
One of our favorite parts of Sutton is its versatility. In this adaptation, see how we add a sweet touch of blue to the white linen daygown. Changing the fabric for the facing also allows you to add the Swiss insertion for added interest. The sweet ideas are endless.


Supplies
Pattern: Sutton
Fabric: Handkerchief Linen White & Blue
Laces/Trims: Swiss Beading 832
Buttons: Mother of Pearl Button 215, Size 12 (.31") *Available at childrenscornerstore.com while supplies last.
Supplies
Children’s Corner Sutton Tracing Paper Swiss Insertion (3/8") – 11/8 yard Fabric for Contrast Facing – length of gown if cut on grain, or 3/8 yard if not cut on grain
Instructions
1. Trace Sutton Daygown Front pattern piece #1. 2. Moving away from the center front, measure 1 1/4" away from the Fold line B and draw a parallel line from the top of the gown to the bottom. This will become your new cutting line for the Daygown Front.

3. Cut 2 fronts using new pattern piece. 4. Cut 2 new facings out of contrast fabric as shown in the chart below.

5. Cut neck bias band out of contrast fabric 1 1/2" width X the length of the pattern piece.
6. Sew Swiss insertion to contrast facing with right sides together using 1/4" seam. 7. Trim seam to 1/8" and press toward facing. 8. Fold and press the long edge without insertion 1/4” to the wrong side of the fabric.

9. Sew panel to front edge of gown using 1/4" seam. Trim and finish with a zig zag (width of 4.0mm, length of 1.0mm). Stitch next to the holes but not in the holes.

10. Press contrast fabric with wrong sides together so the 1/4" folded edge will meet the edge of the trim. Whipstitch in place.

11. Using the original Sutton Daygown Front pattern piece, lay it on the newly constructed fronts and cut out the neck edge. Repeat with opposite front gown.
12. Sew shoulder seams using French Seam.
13. Trim 1/4" off of the neck.
14. Press one long edge of neckband 3/8" to wrong side then unfold.
15. Stitch band to neck using a 3/8" seam allowance.
16. Refold band and whip stitch the folded edge at the stitching line.
17. Continue with sleeve band and finish following Sutton instructions.
Adaptation by
Greta Harber

Click the printer icon below for printable version.


